How to create pages with Dolphin Page Builder
This is a step by step tutorial with screenshots for easy reference which shows you how to create a new page with the Dolphin page builder and how to add a link to it in the navigation menu.You should have a good working Dolphin installation with no errors or problems.
This tutorial is based on a standard Dolphin 7 installation with screen shots form the default uni template.
After reading this, you might also want to check out:
Dolphin Page Builder Part 2 - Additional Tips
- Moving the Navigation Menu Link.
- Updating, changing, and editing content of your new page.
- Adding a second column to your new page.
- Changing the column width of a page after adding a second column.
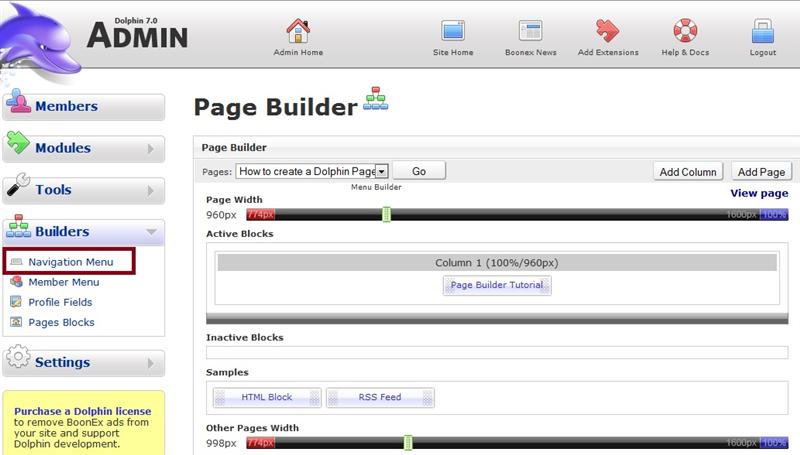
Steps to create a page with the Dolphin Page Builder
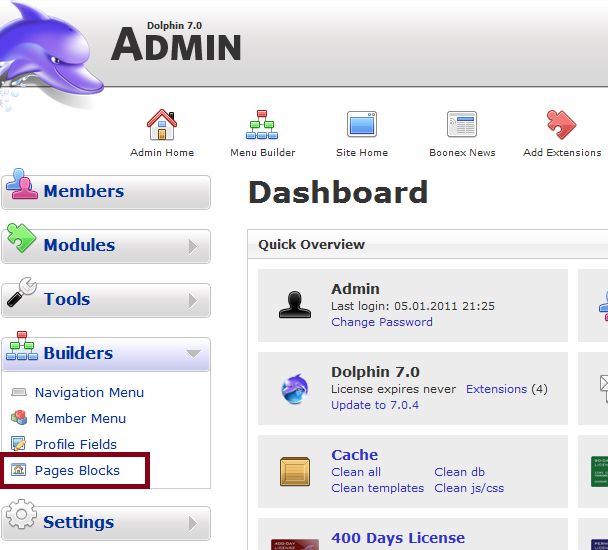
1. Login to your Dolphin Administration panel and find:Builders
-Pages Blocks
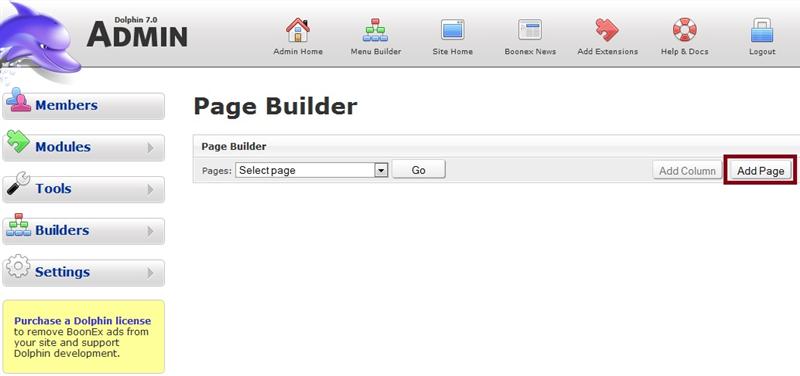
2. Click on the "Add Page" button.
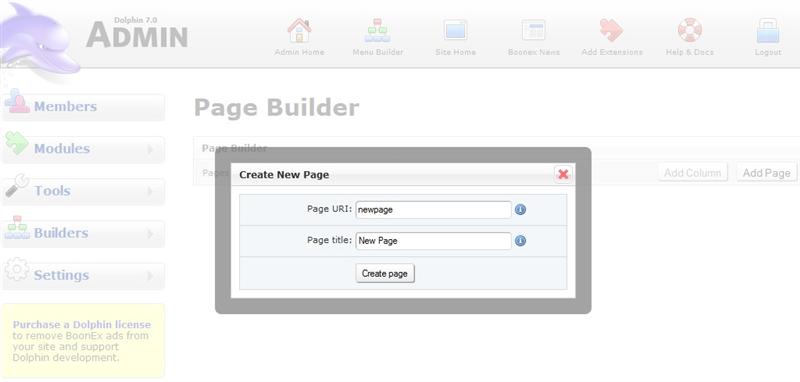
3. Here is where you enter the Page URI (URL/link) and the Page Title.
The page URI will be the link to the new page with /page/newpage format or structure. Which will look like http://www.yoursite.com/page/newpage in your web browser.
Be sure to choose your Page URI and Page Title wisely before clicking the create page button. (Think about SEO here.)
You can use hyphens as word separators, which is what I will be using in this example.
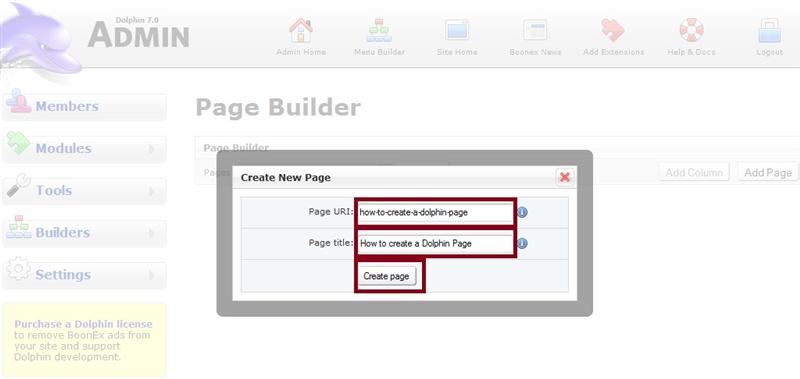
4. Enter new page details.
For this tutorial I will use:
Page URI: how-to-create-a-dolphin-page
Page title: How to create a Dolphin Page
Click Create page button.
Note:
You will want to use your own unique Page URI and Page title.
5. Now you will see your new page in the Page Builder list.
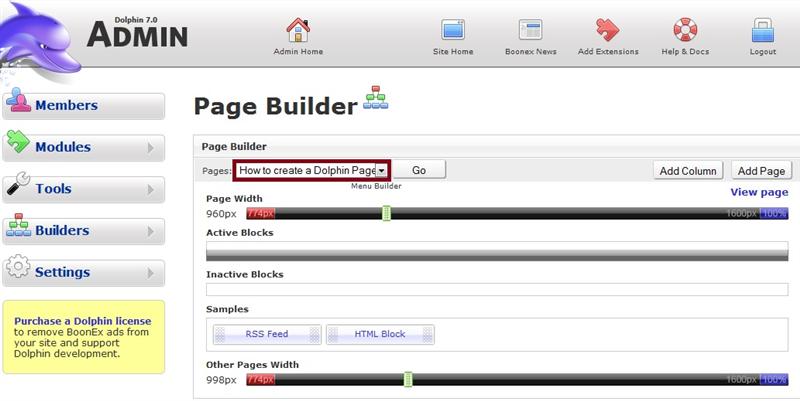
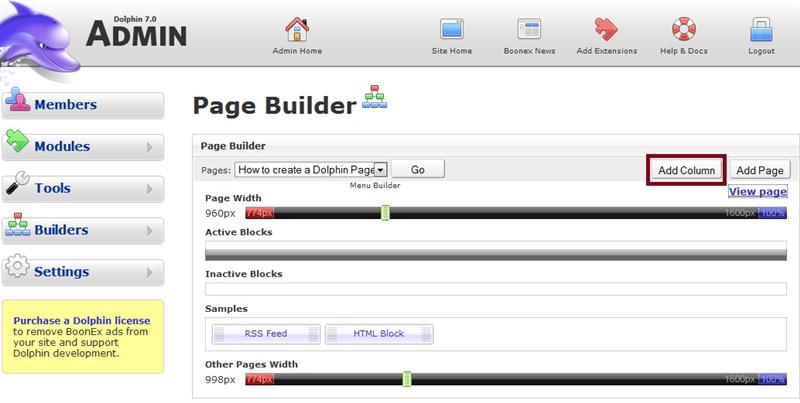
6. First we need to add a column to the new page. Find and click on the "Add Column" button.
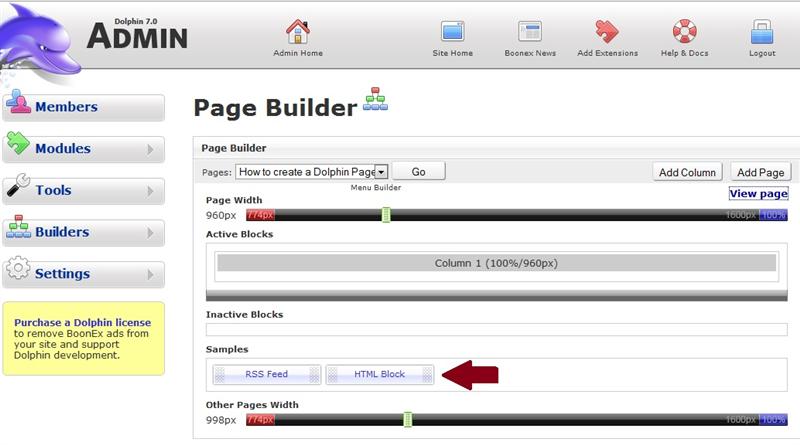
7. And now you can see Column 1 has been added to the page.

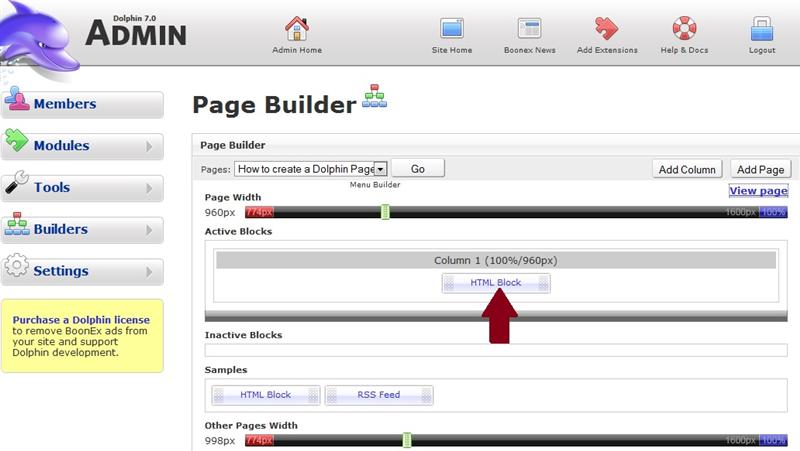
8. The next step is to add an HTML Block to the Active Blocks area of the page. Simply drag an HTML Block up to the Active Blocks Column 1 area and release it.
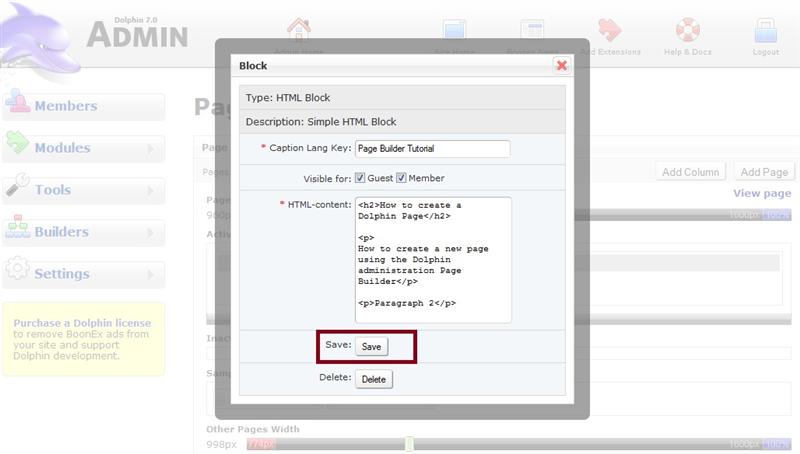
9. Now click on the center of the HTML Block in Column 1 Active Blocks so we can add some content to the block.
10. We need to add a Caption Lang Key, whether we want it to be visible for Guest or Member, and enter our desired HTML content.
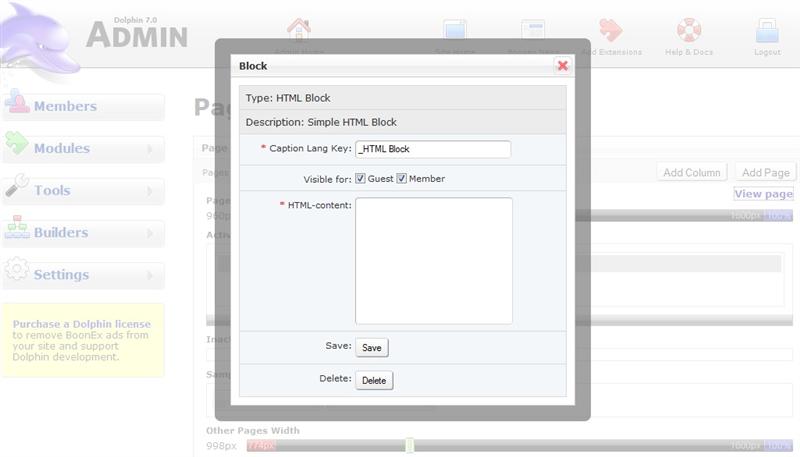
11. For this tutorial I will enter:
Caption Lang Key: Page Builder Tutorial
Visible for: Guest and Member checked
HTML-content: Your desired content
Click the Save button.
Note:
The Caption Lang Key will be the title of the block. Decide who you want it visible for - guests, members, both, or neither. HTML-content will be the content inside the block.
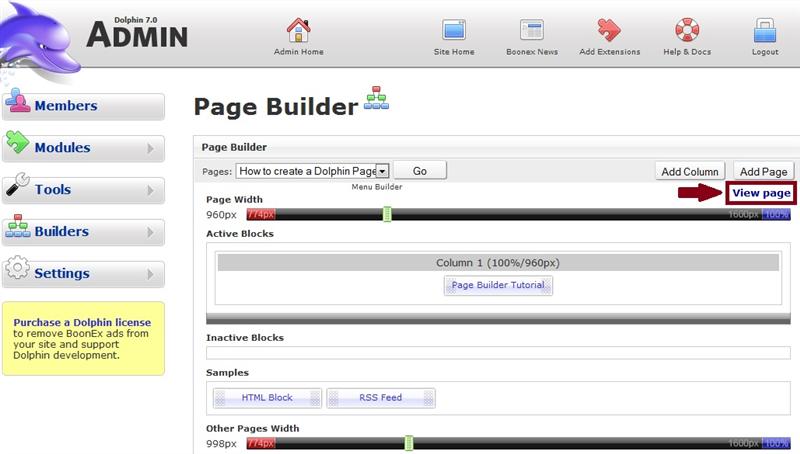
12. And now you can see that the HTML Block becomes the Page Builder Tutorial block.
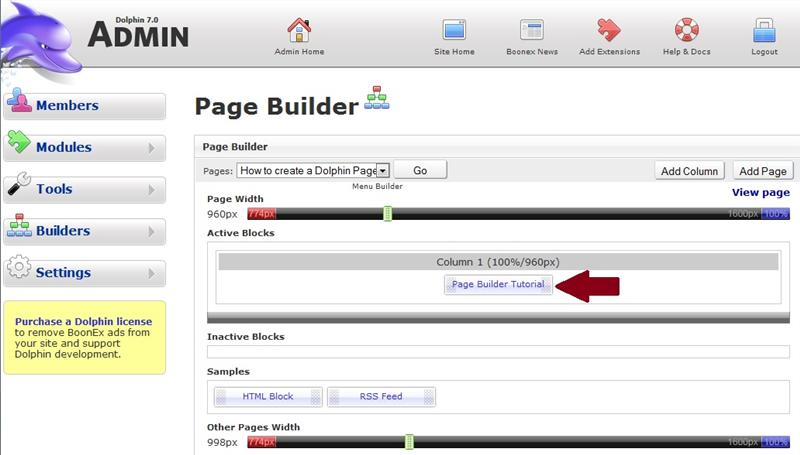
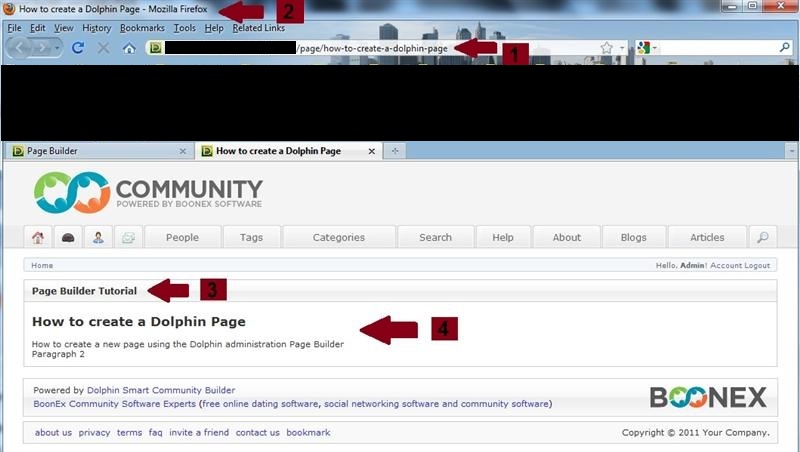
13. Let's take a quick look at our new page and block. Click the "View page" link.
14. Here is the output in a browser.
From what I entered in step 4:
1. The Page URI: /page/how-create-a-dolphin-page
2. Page title: How to create a Dolphin Page
From what I entered in step 11:
3. Caption Lang Key: Page Builder Tutorial
4. HTML-content
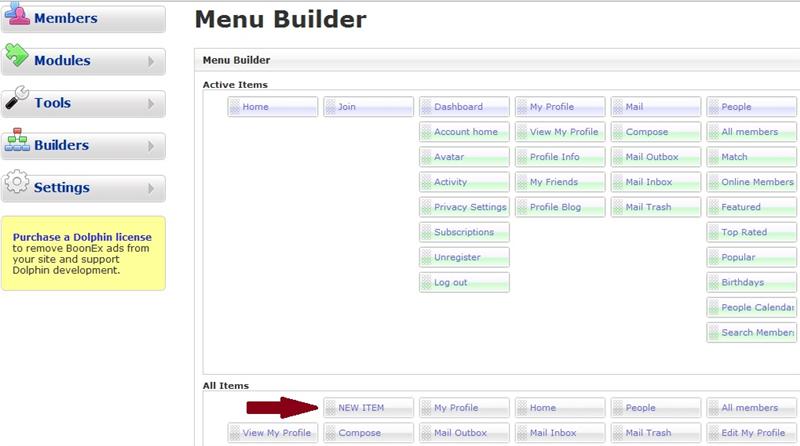
15. Now in order for someone to find the new page we are probably going to want to create a link in the navigation menu.
Click on:
Builders
-Navigation Menu
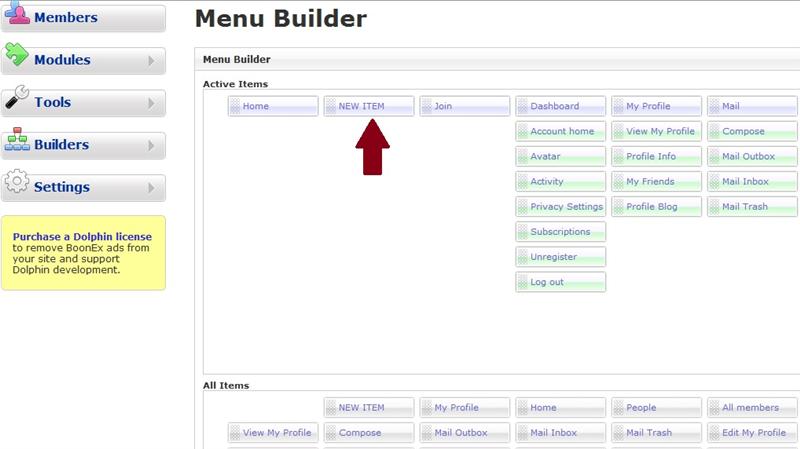
16. Drag a "New ITEM" block up to the "Active Items" area.
17. Once it is in the Active Items click on the center of the "New ITEM" block.
18. You will see a screen like this:
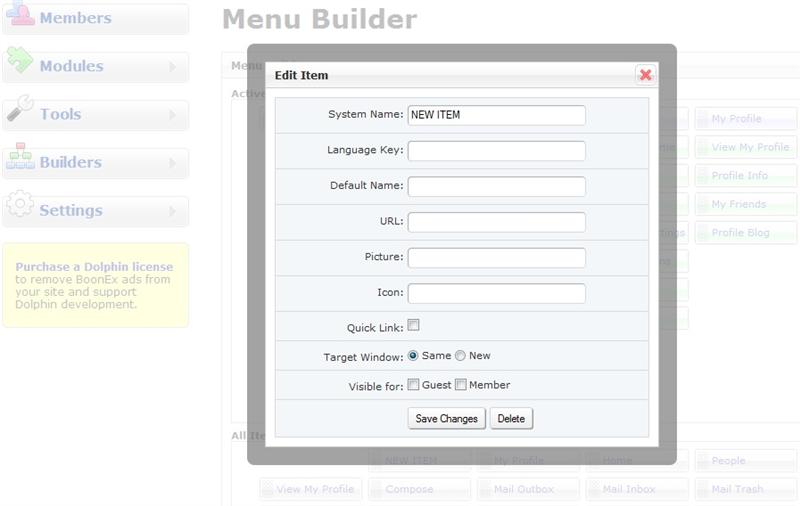
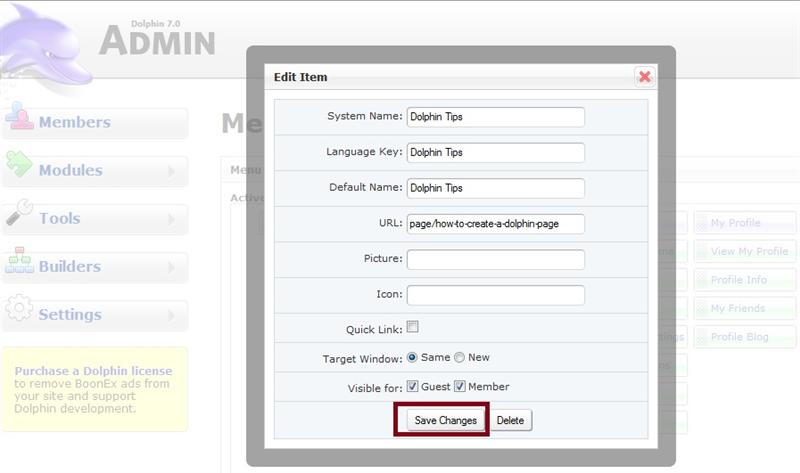
19. Enter your desired navigation menu details for example:
System Name: Dolphin Tips
Language Key: Dolphin Tips
Default Name: Dolphin Tips
URL: page/how-to-create-a-dolphin-page
Visible for: Guest and Member checked.
And "Save Changes" button.
Note:
You can come back here at a later time and add a picture or icon, and make changes if you wish.
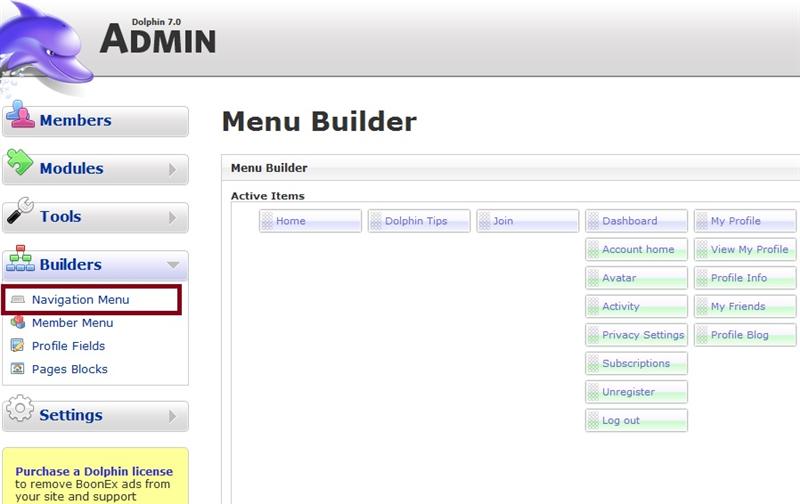
20. If the block still says: "New ITEM" you can just click on the "Navigation Menu" link again and it should change to the Name you just created, in this case, Dolphin Tips.
21. Now visit and refresh the new page again to verify the changes.
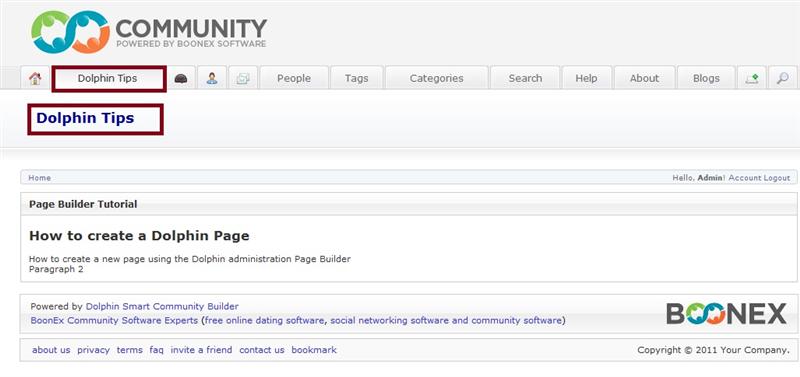
Use this tutorial as a reference for creating Dolphin pages with your desired uri (url/links) page title, navigation menu, html blocks and content.
After reading this, you might also want to check out:
Dolphin Page Builder Part 2 - Additional Tips
- Moving the Navigation Menu Link.
- Updating, changing, and editing content of your new page.
- Adding a second column to your new page.
- Changing the column width of a page after adding a second column.
Last modified 15 years ago
Last modified on Jan 28, 2011, 9:33:29 AM
Attachments (21)
- 1-admin-home.png (65.5 KB) - added by gameutopia 15 years ago.
- 2-admin-page-builder.jpg (27.6 KB) - added by gameutopia 15 years ago.
- 3-admin-page-builder-create-name-page.jpg (23.0 KB) - added by gameutopia 15 years ago.
- 4-admin-page-builder-create-name-page.jpg (25.2 KB) - added by gameutopia 15 years ago.
- 5-admin-new-page-created.jpg (44.5 KB) - added by gameutopia 15 years ago.
- 6-admin-page-builder-add-column.jpg (44.1 KB) - added by gameutopia 15 years ago.
- 7-admin-page-builder-new-column-added.jpg (48.0 KB) - added by gameutopia 15 years ago.
- 8-admin-page-builder-drag-html-block.jpg (47.5 KB) - added by gameutopia 15 years ago.
- 9-admin-page-builder-click-on-center-active-html-block.jpg (48.4 KB) - added by gameutopia 15 years ago.
- 10-admin-page-builder-html-block-add-content-window.jpg (31.6 KB) - added by gameutopia 15 years ago.
- 11-admin-page-builder-html-block-add-content-window2.jpg (36.6 KB) - added by gameutopia 15 years ago.
- 12-admin-page-builder-html-block-content-updated.jpg (47.4 KB) - added by gameutopia 15 years ago.
- 13-admin-page-builder-view-page.jpg (47.2 KB) - added by gameutopia 15 years ago.
- 14-admin-page-builder-view-page-edited.jpg (85.6 KB) - added by gameutopia 15 years ago.
- 15-admin-select-navigation-menu.jpg (50.7 KB) - added by gameutopia 15 years ago.
- 16-admin-menu-builder-find-new-item.jpg (43.9 KB) - added by gameutopia 15 years ago.
- 17-admin-menu-builder-added-to-top-menu.jpg (39.8 KB) - added by gameutopia 15 years ago.
- 18-admin-menu-builder-edit-new-item.jpg (36.5 KB) - added by gameutopia 15 years ago.
- 19-admin-menu-builder-edit-new-item-updated.jpg (37.5 KB) - added by gameutopia 15 years ago.
- 20-admin-back-to-menu-builder.jpg (41.5 KB) - added by gameutopia 15 years ago.
- 21-navigation-menu-check.jpg (36.8 KB) - added by gameutopia 15 years ago.
Download all attachments as: .zip
