| Version 3 (modified by gameutopia, 15 years ago) (diff) |
|---|
How to install 3rd party Dolphin 7 Modules
A begginers guide
This tutorial with screenshots shows you how to upload and install Dolphin 7 modules using a ftp client.
What is required:
- A good working Dolphin 7.0x version with no errors, problems, or issues.
- A ftp client (for fast upload) such as filezilla (free). http://filezilla-project.org/download.php
- A Dolphin Module that is compatible with your current version.
Who this will help the most?
Those that are new to Boonex Dolphin and might be a little lost or confused about how to add new modules to their Dolphin 7 web site.
For demonstration purposes of this tutorial I will be using the Dolphin 7 Module:
Deanos Tools - V1.8.1 - Dolphin 7.0.x Version (FREE)
Compatible with:
Dolphin: 7.0.0, 7.0.1, 7.0.2, 7.0.3, 7.0.4 (at the time I wrote this November 30, 2010).
About the module:
This is a great FREE Dolphin 7 Module. It includes a number of useful tools that a Dolphin webmaster or administrator can really appreciate. Be sure to check out Deanos other modules and mods at Boonex Unity ( deano92964 at Boonex Unity ). He has some really top notch downloads available.
Installing a Dolphin 7 Module:
1. Download Deanos Tools directly from Boonex here:
Deanos Tools V1.8.1 - Dolphin 7.0.x Version
2. Extract the contents of the .zip file you just downloaded to your local computer.
The desktop would be a good choice for windows based computer users.
3. Open - Start up filezilla (free ftp client).
(If you don't have it you can get it for free from: http://filezilla-project.org/download.php ). Windows, linux, and mac os x versions available.
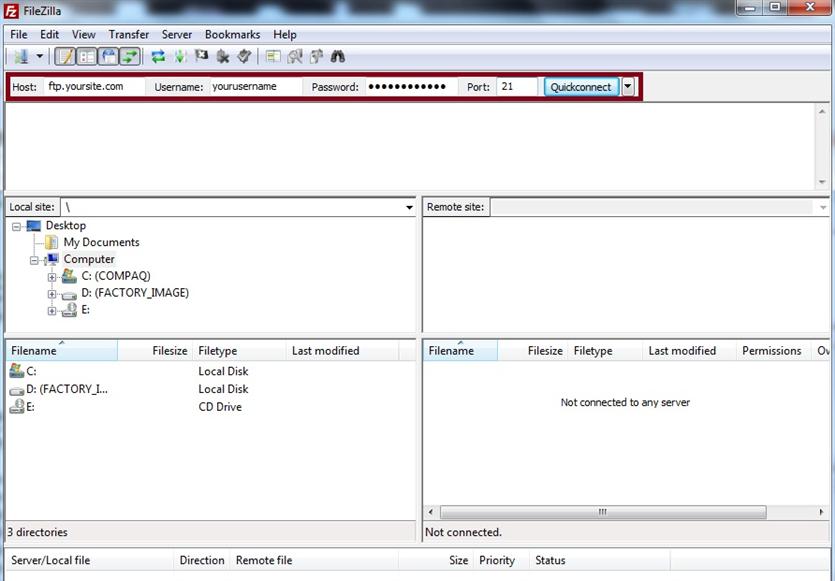
4. Ftp into your site using the login details that your host provides.
Example:
- Host: ftp.yoursite.com
- Username: yourusername
- Password: yourpassword
- Port: 21
Then, click Quickconnect.
Note:
If you are unable to connect double check your host, username, password, and port number. Most hosts send you a welcome email with these details. If you have lost that information you can double check with them, or have them resend it to you.
5. Once you are connected you will see 2 coulumns.
The column on the left is files and folders on your local pc or computer. The column on the right will be files and folders in your hosting account or server (your web site).
We want to upload Deanos Tools from our local pc (left column) to our hosting account (right column).
6. First we want to find Deanos Tools on our local pc
Since we extracted it earlier in step 2 to our desktop we will need to navigate to our desktop in the left column and find "Deanos Tools For D7".
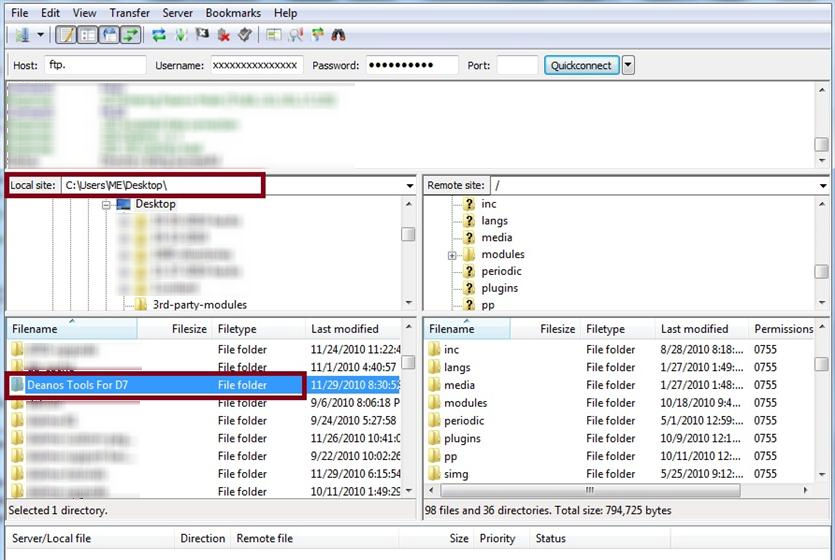
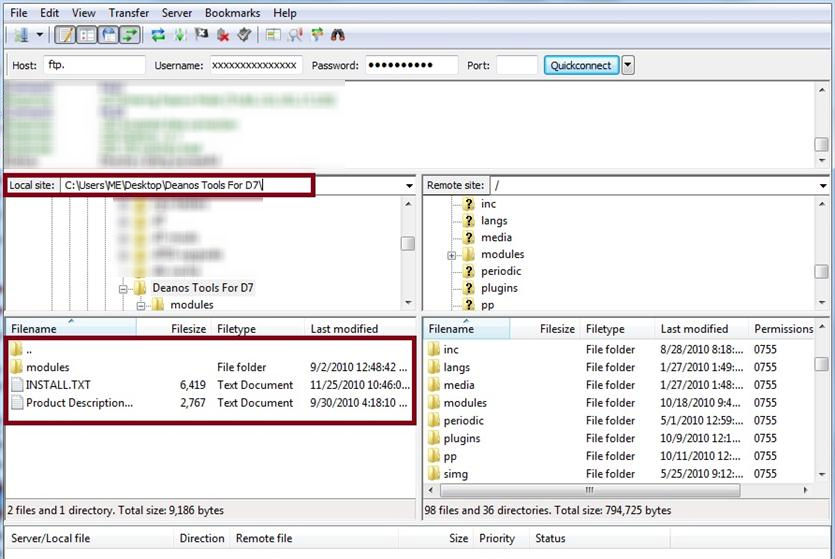
7. Now we will double click on Deanos Tools For D7 to go into the folder.
Here, we can see the modules folder inside Deanos Tools For D7 on our local pc.
8. Now go into the modules folder by double clicking on modules.
Inside will be a folder called deano.
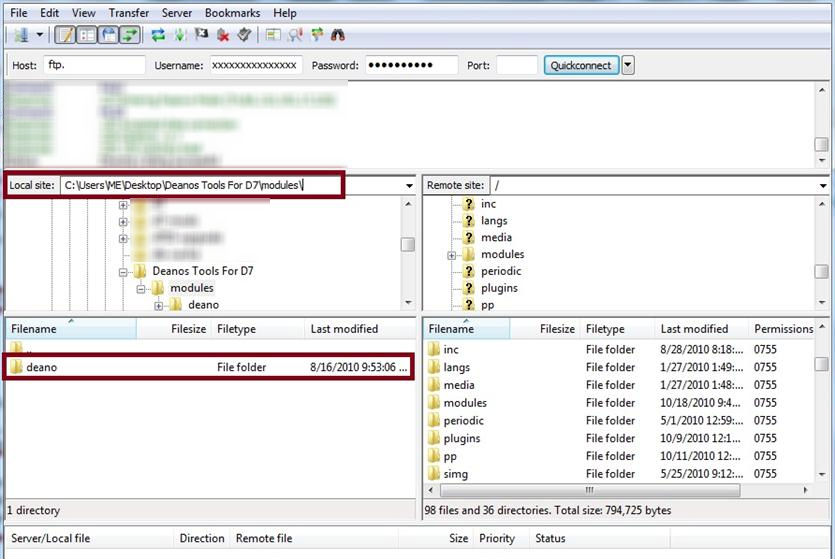
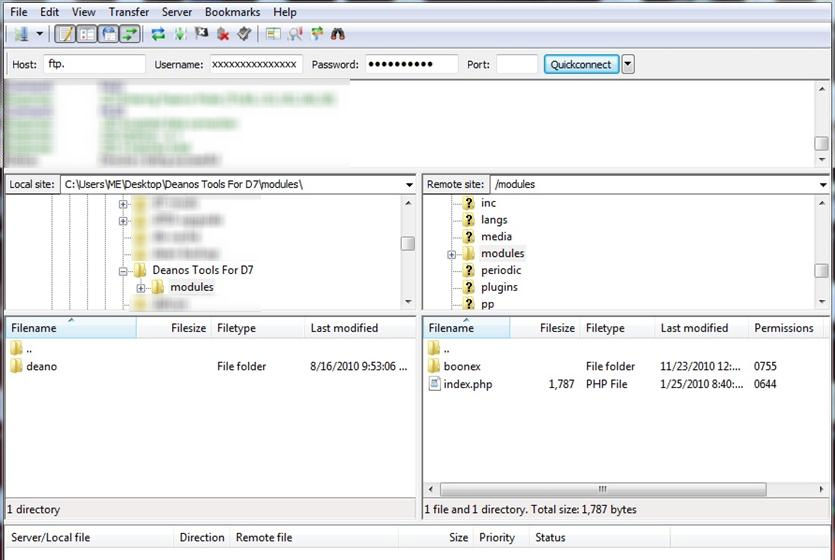
9. Now we want to make sure we upload it to the correct location in our Dolphin 7 web site.
So we need to navigate and find the modules directory in our hosting account (right column).
Find and locate the modules directory (folder) in the right column.

10. Double click the modules directory (folder) in the right column to go into it.
Once inside you will see the directory (folder) called boonex, and a file called index.php.
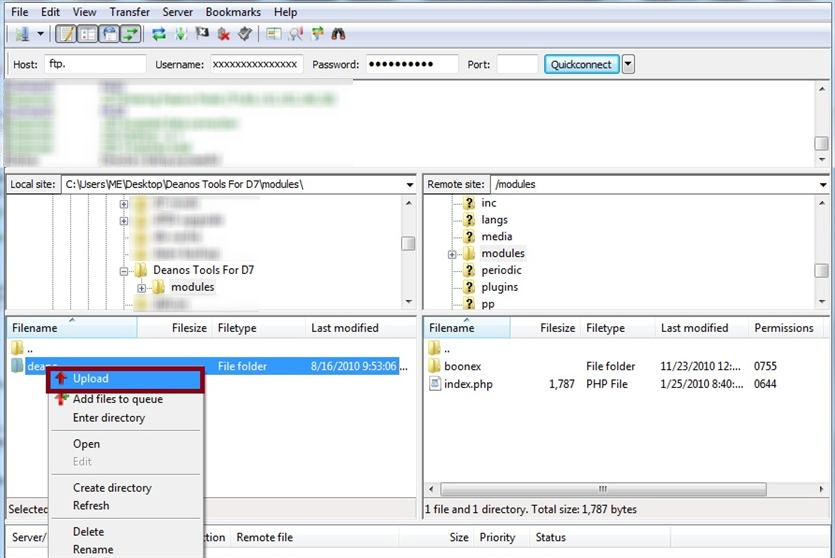
11. Now we want to upload the deano folder from our local pc (left column) to our modules directory in our hosting account (right column).
Simply right click on the deano folder in the left column and select upload. Then, wait for it to complete and finish uploading.
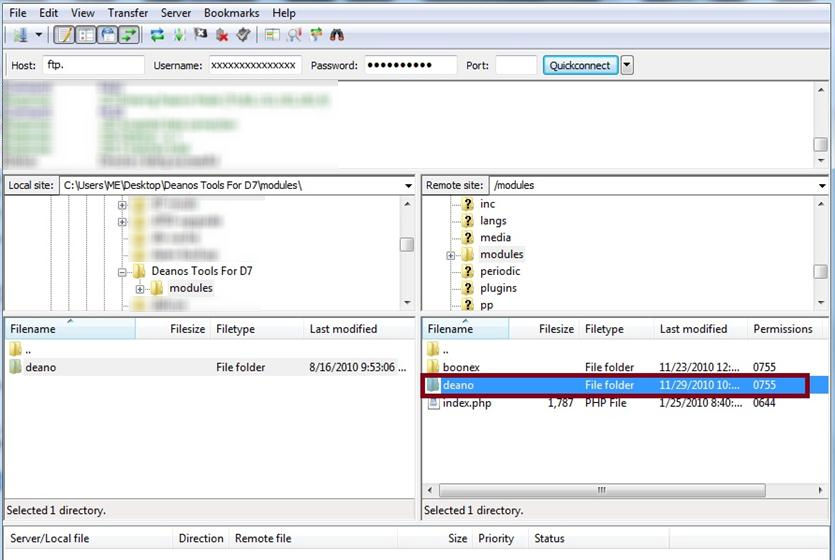
12. Once complete you will see deano in the modules directory on the right along with the boonex directory (folder), and index.php.
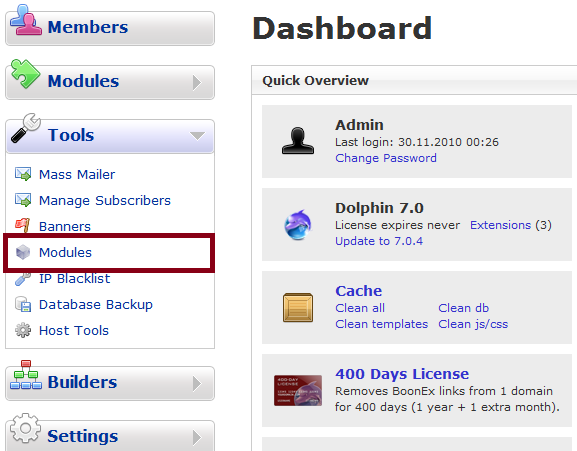
13. Now to finish up the install we need to login to our Dolphin 7 Administration Panel.
Login by going to: http://www.yoursite.com/administration (if Dolphin is installed in root)
Or Login: http://www.yoursite.com/community/administration (where community would be a subfolder.)
Then find and navigate to:
- Tools
- Modules
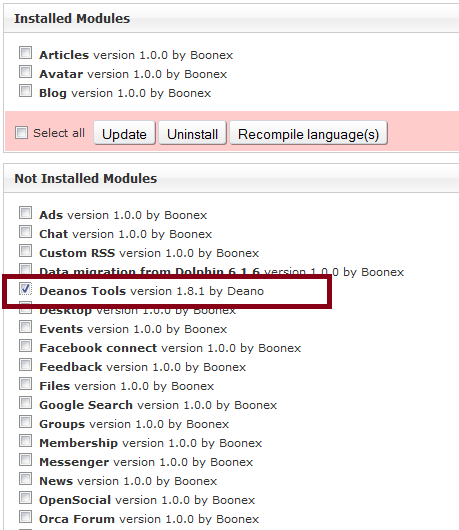
14. Scroll down the page until you find the "Not Installed Modules" list.
Tick or check the box for "Deanos Tools".
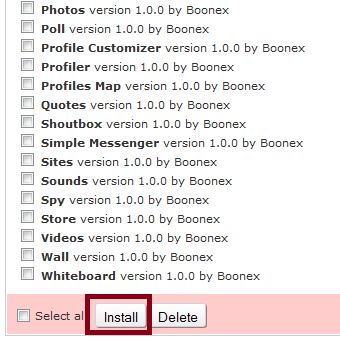
15. Then scroll down a little further and click on the "Install" button.
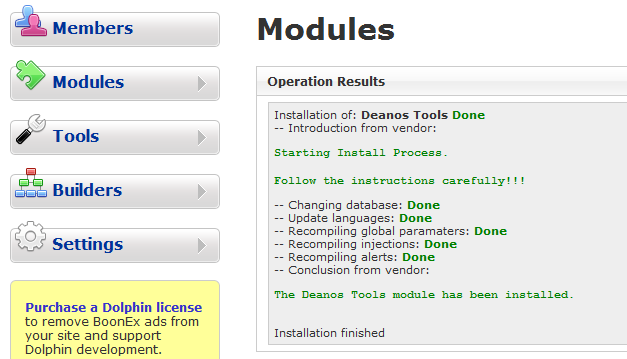
16. Now you will see an Operation Results page.
If all is well you will see in green text the module has been installed and finished (green text = good and successful).
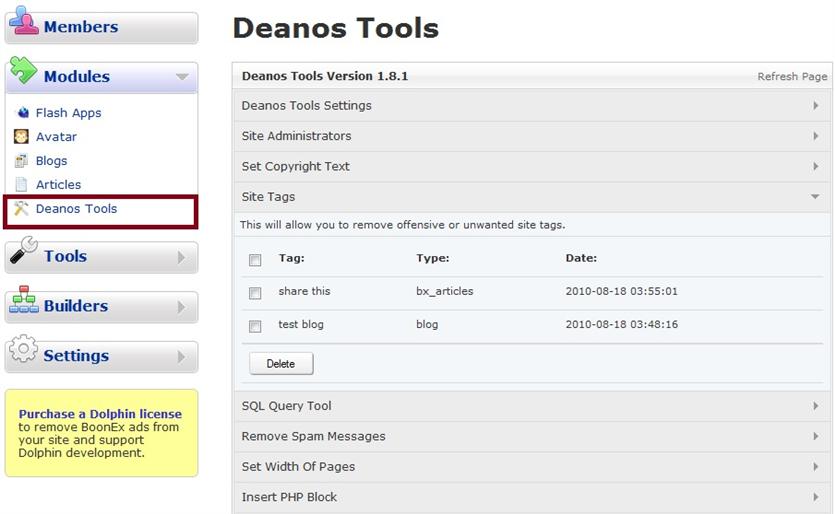
17. You can find the newly installed Deanos Tools in the Modules column on the left.
Once you go there you can use the features of the Deanos Tools in the center of the screen.
Additional:
Other modules can be installed very similar. It is just a matter of uploading them to your web site's modules directory or folder, and then installing and activating them in the administration panel.
Sometimes people mistakenly upload them wrong. They neglect to go into the folder or directory far enough or they don't keep the directory (folder) structure intact.
Also be sure to review the instructions that come with the module before installing. Make sure the module is compatible with your current version of Dolphin.
There is a feature in the Dolphin 7 Administration area to upload a module, but currently it is better to manually upload them with a ftp client (filezilla) because some people do not pack and .zip up the module right for this method. It is better to manually upload the module just to make sure it gets installed right.
Attachments (13)
- filezilla-connection-details.jpg (53.9 KB) - added by gameutopia 15 years ago.
- deanos-tools-desktop.jpg (91.0 KB) - added by gameutopia 15 years ago.
- deanos-tools-inside.jpg (88.9 KB) - added by gameutopia 15 years ago.
- deano-inside-module-folder.jpg (83.3 KB) - added by gameutopia 15 years ago.
- modules-directory.jpg (79.9 KB) - added by gameutopia 15 years ago.
- inside-modules-directory.jpg (68.2 KB) - added by gameutopia 15 years ago.
- upload-deano.jpg (76.2 KB) - added by gameutopia 15 years ago.
- deano-uploaded.jpg (71.9 KB) - added by gameutopia 15 years ago.
- admin-tools-modules.png (40.8 KB) - added by gameutopia 15 years ago.
- select-deanos-tools.png (20.3 KB) - added by gameutopia 15 years ago.
- install-deanos-tools.png (11.2 KB) - added by gameutopia 15 years ago.
- dean-tools-installed.png (28.3 KB) - added by gameutopia 15 years ago.
- use-deanos-tools.jpg (46.3 KB) - added by gameutopia 15 years ago.
Download all attachments as: .zip
